Power Apps enables users to build business-centric apps incredibly easily. Users can streamline business tasks and make their work more efficient. The program allows users to build their own web-based apps and mobile apps, which can be also used within other Microsoft programs.
Today we're going to look at the basics of Power Apps, and go through how to build a basic app using our own dataset.
Getting Started with Power Apps
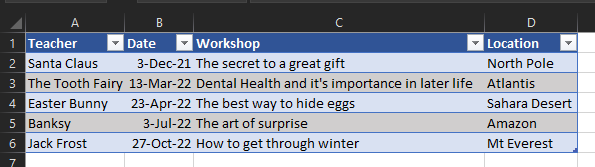
For this example, let’s say we want to make an app to show which teacher is delivering certain workshops where and when.
First, make your spreadsheet of data in Excel, and make sure you format your data as a table.
Now we’re going to put this data into Power Apps, which will do all the hard work for us and turn our data into an easy-to-use application.
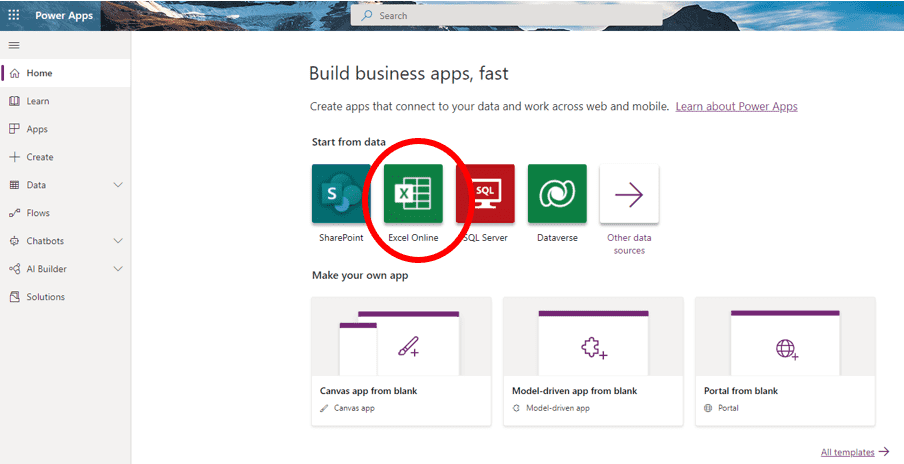
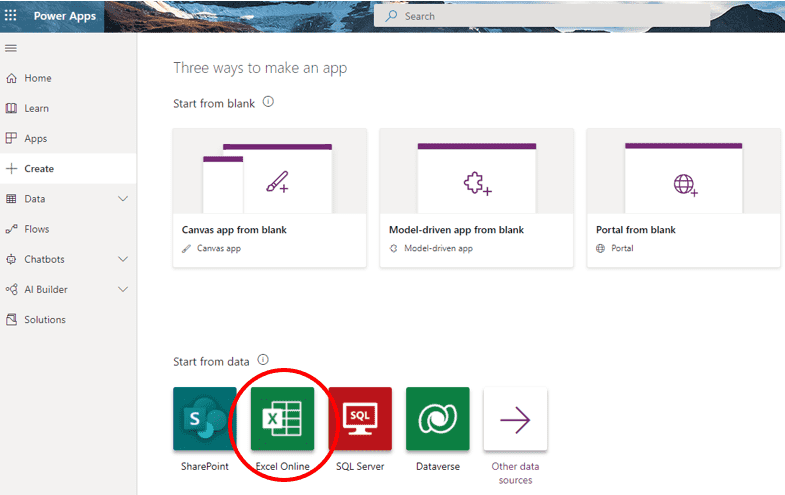
Open up Power Apps, and click on ‘Start from data’, so we can use the dataset we've just made in Excel. This can be done from multiple points within the app.
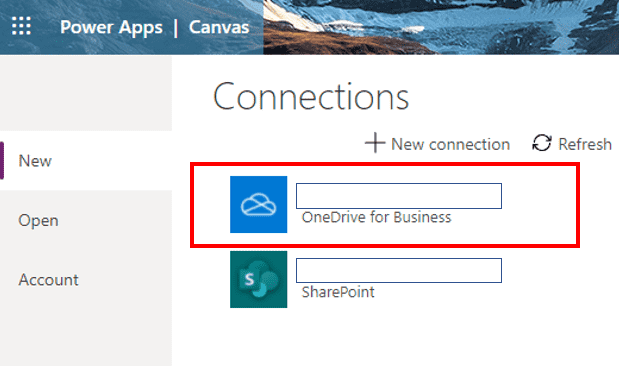
Next we’re going to select our data source, which in this case has been automatically saved into OneDrive. If you haven't done so already connect the data source where you saved your excel file. Click ‘Phone layout’ under the 'OneDrive for Business' option.

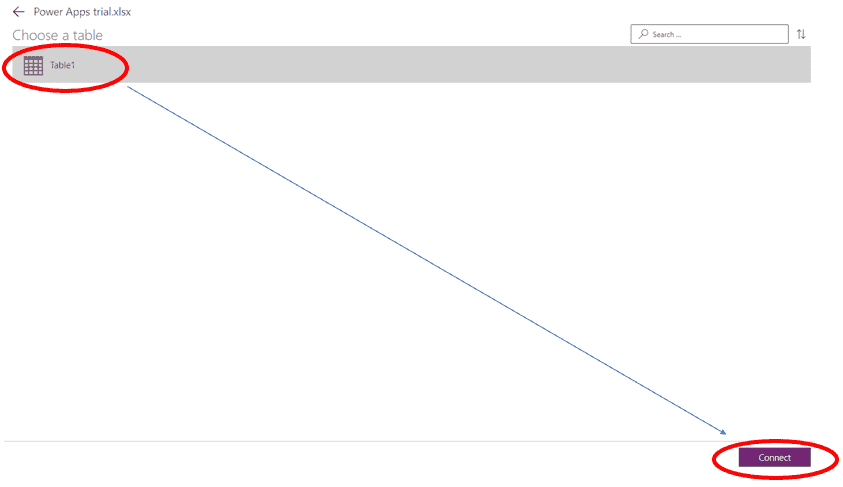
Select ‘Workshop Delivery Dates’, which is the dataset we've just made in Excel, then select your formatted table, probably called 'Table 1', and click 'Connect'.
Now Power Apps will start working its magic and start building your basic app from the ground up.
Tip: If for some reason your app shows up as blank after Power Apps processes your data, it could be because you have your Excel file still open. Close Excel and refresh Power Apps, and then your data should show up.
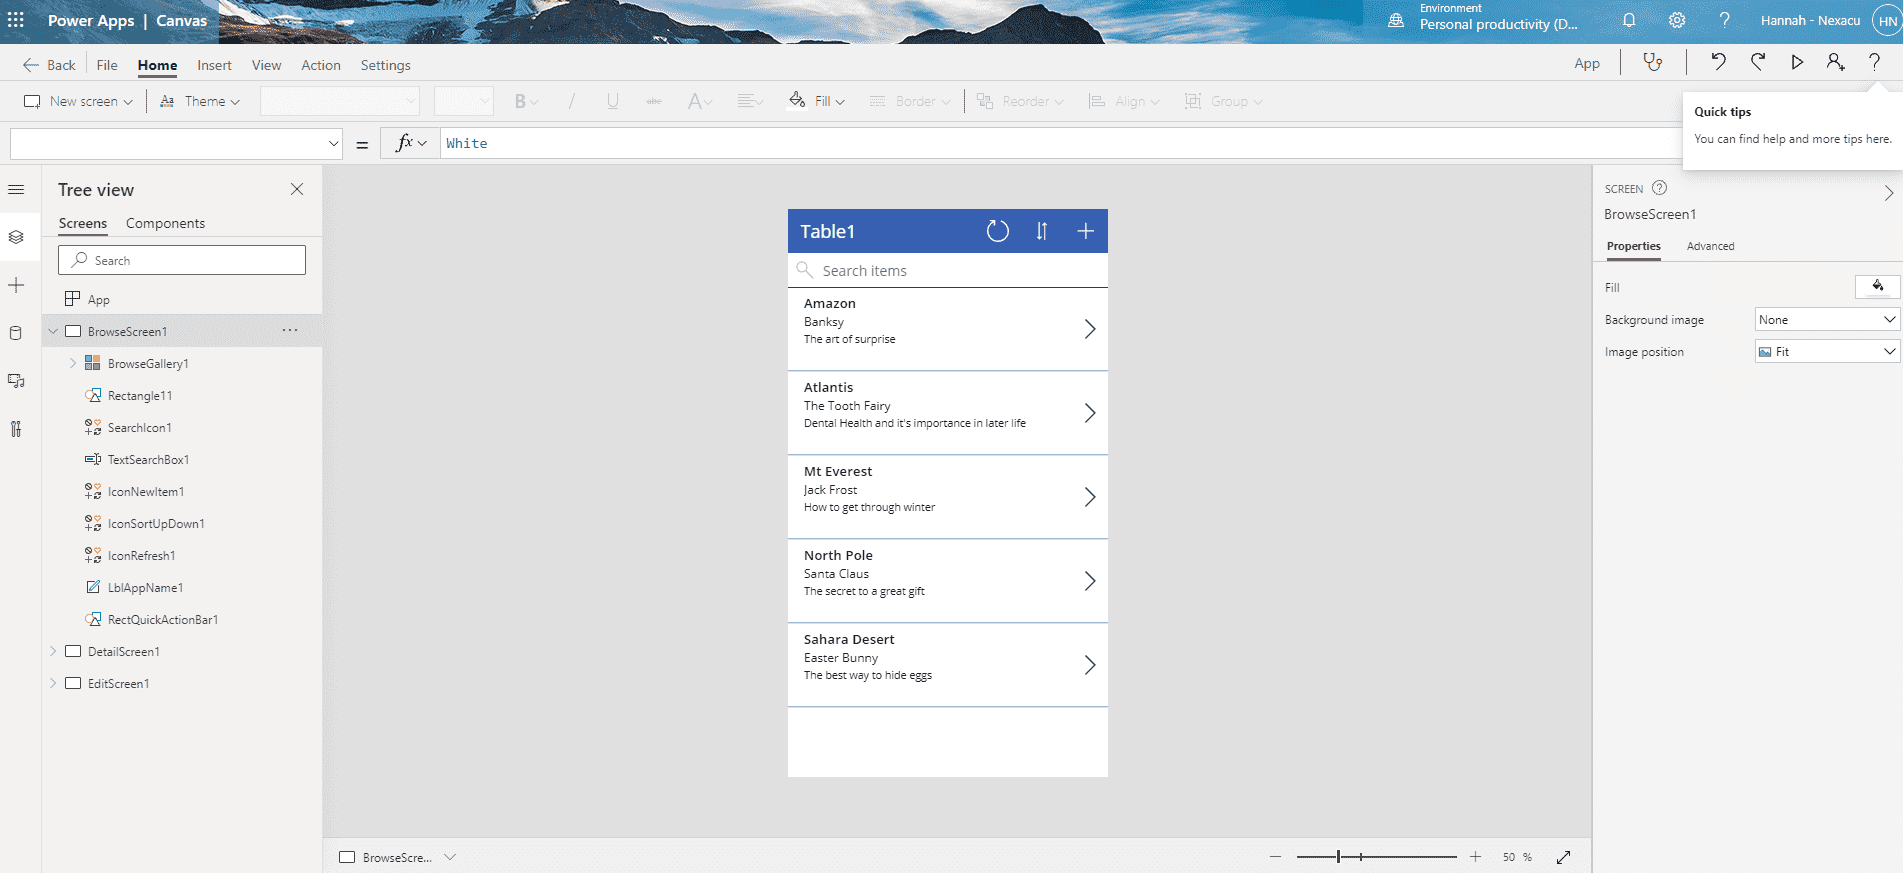
So here is our brand new app!
To preview our working application so far, hit the play button in the top right-hand corner. Here you can take a closer look at your data, edit and sort it, and add in new data. The search function is also handy – in this case, if we had a long list of employees and we wanted to find who is presenting which workshop, we can simply type in the employee's name in the search bar of the app to find their details.
Formatting Your Power App
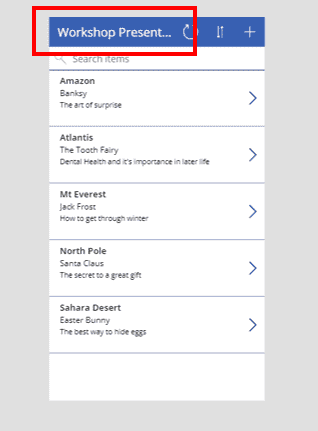
Now let’s change a few things to make the app a bit more functional. For instance, we can change the name of our data from 'Table 1' to ‘Workshop Presentations’ by simply double-clicking and typing in the text field.
Next we can change the order of the data categories, such as the employee name, workshop topic, location and date.
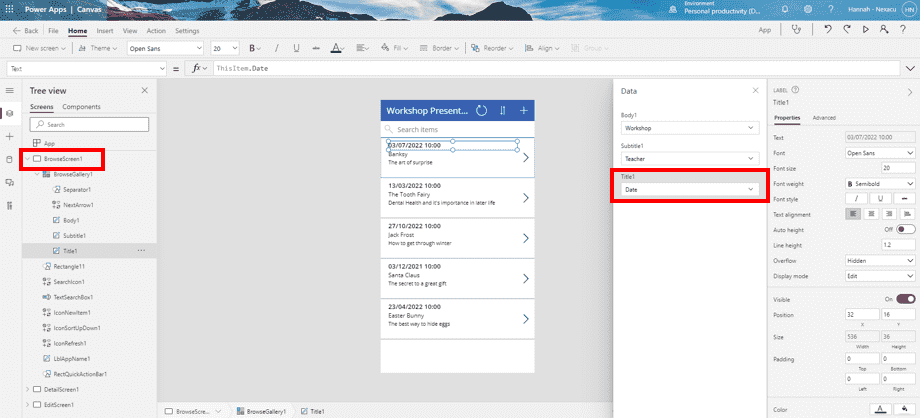
First, click ‘BrowseGallery1’ to the left of the screen. On the right-hand side, click edit under the ‘Fields’ category. Here we can rearrange our data categories using the drop-down menus. In this example, we want to display the workshop date rather than the location.
Next we can change the way our data is sorted in the app. In this example, let’s change it so our data is sorted by the workshop date, instead of by the alphabetical order of employee names. Click 'BrowseGallery1' again, and then change where it says ‘Employee’ in the data source/function bar (as seen in the above image), and write in ‘Date’ to match this data category.
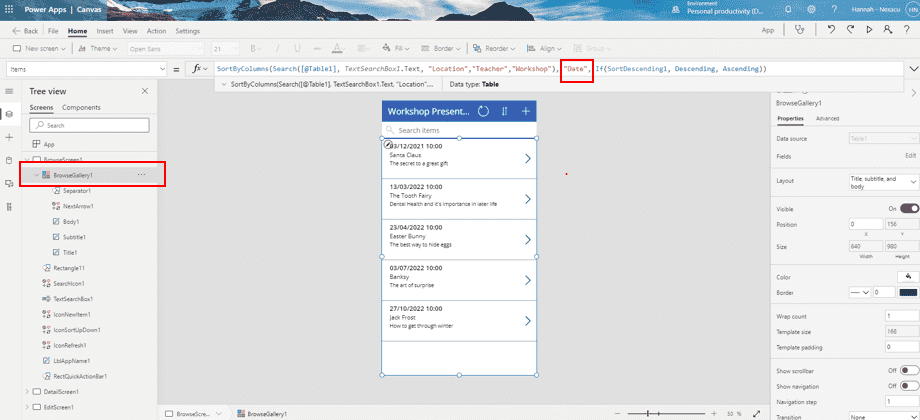
Now the data in our app is sorted in order of when workshops are due to be delivered by each employee. Try clicking the play button again in the top right-hand corner to preview our brand new, reorganised app.
Stay tuned for our next blog where we will talk about how to publish and share an app made in Power Apps.
If you're interested in learning more about Power Apps and how to best use it to benefit your work and business, check out our Power Apps courses!
 phone
phone
 email
email
 enquiry