
Your Power BI Guide
Follow our tutorial below and learn how to remove rows by filtering data in Power BI.Excel files imported into Power BI need to be consistent in their format. Especially their structure for foolproof query refreshing and data workflow. In most cases that is indeed the case but you might have situations where the format is not consistent.
You might have a situation where the Excel file is exported from another source system and the actual data starts at different rows for every export. In such cases standard ‘Remove Rows’ transformation steps are not useful as the row number relating to the actual data changes between refreshes. This article will describe a way around the problem to handle such a scenario.
Consider the following sheet from a spreadsheet which is exported weekly from an ERP system.
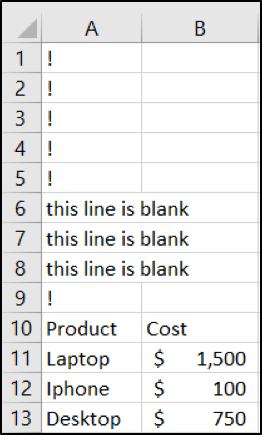
In this export, the actual data starts from row 10 which are the row headers. However, in the next export the data might start from row 8 and in the following export the data might start from row 15, and so on. The row number pertaining to the start of the actual data is random and cannot be predicted across different exports. In the export, the objective is to remove the top 9 rows from the sheet.
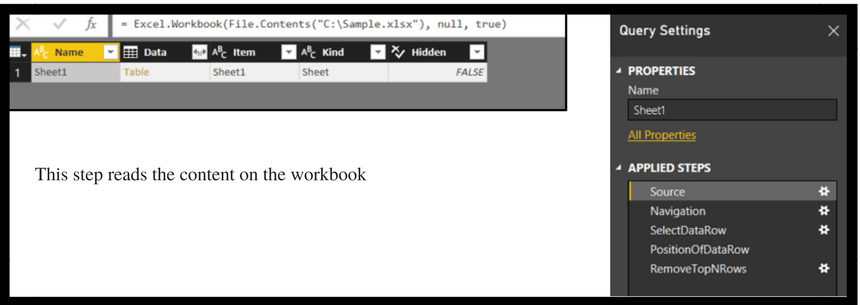
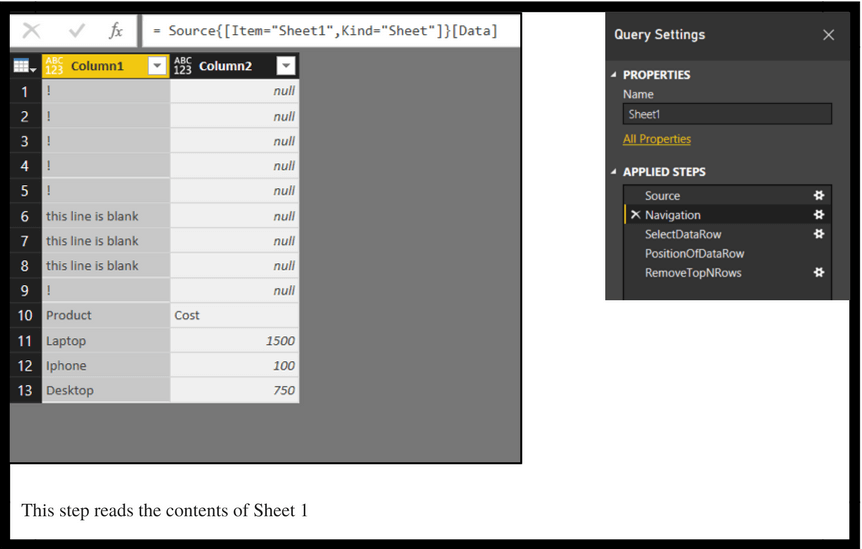
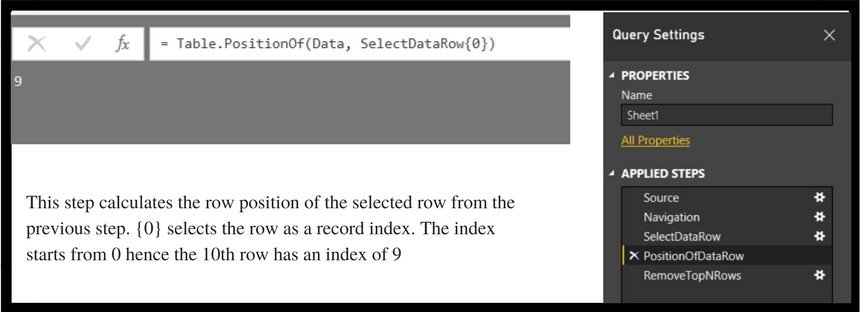
Let's see what the data looks like at each of the applied steps
We have demonstrated how to extract and filter data from an Excel spreadsheet when the data can start at any row in the spreadsheet. Let us know if you put this to use!
View Power BI Courses